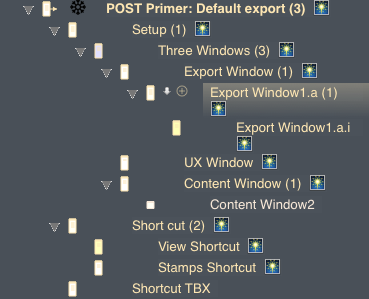
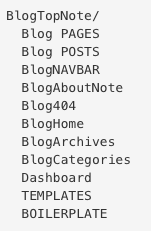
POST Primer: Default export
Here is a top of a POST about BoxPress Tutorial for Beginners.
Please have a clear perception of BoxPress.
As producer explain about BoxPress in his HomePage.
BoxPress ------ an export system as flexible as intelligent and flexible as Tinderbox.
S’il vous plaît avoir une perception claire de BoxPress.
En tant que producteur expliquer sur BoxPress dans sa page d’accueil.
Ich hätte gerne sagen daß BoxPress ein hilfsmittel für Tinderbox HTML export ist.
BoxPressは、TinderboxでHTMLでエクスポートするために用意された優れたツールです。
Hereinbefore you can find the great genealogical chart.
My experimentations will be written along the lines of author's guidance.
POSTS are granular by default—that is, their children export as SmartButtons following the note’s text.
Setup
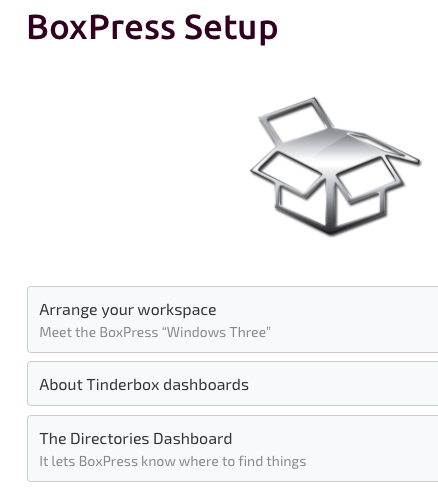
This is image regeneration from BoxPress Learning Centre's Setup.
advice for beginners
未経験者への助言.
BoxPress Setupにはユーザーへの最初の設定方法等が詳しく書かれています。
Arrange your workspace
には、最初にBoxPressを立ち上げた時に現れる3つの「画面」についての
説明が分かり易く説明されています。
最初に表示される画面に戸惑った経験から
一つ一つジックリと読み進めれば全体像が
摑める筈ですが「説明文」を尽く理解するには
時間がかかる事でしょう。
時折、「説明の意味が解らなかったり」、
「何処を探せば、その同じ画像が見れる?」のとか
様々な場面に遭遇しますが、気を落とさないでください!
My $blogExpOpt is normal (empty).
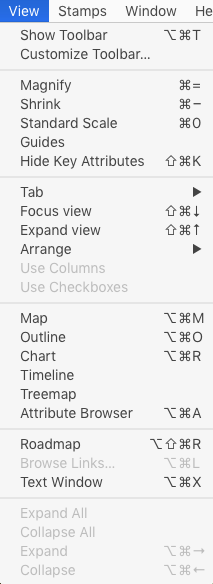
Three Windows
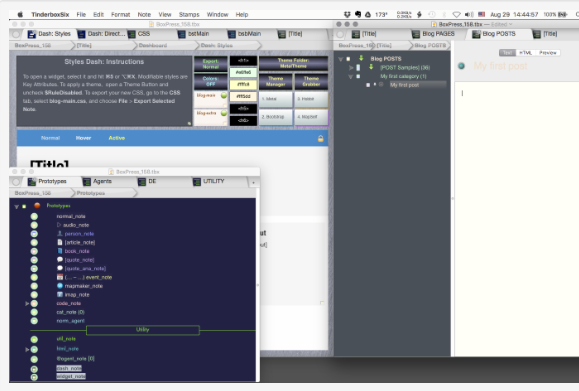
To set-up the Perfect Writing Environment, with Three Windows.
When you open BoxPress.tbx, three windows will emerge
When starting BoxPress, they are 3 screens
UX Window is bottom-left.
Content Window is upper-right.
Export Window is upper-left.
Export Window
This screen image is Export Window.
Styles Dash, the Directories Dash, CSS, Templates, and Boilerplate.
Everything you need to totally manhandle the appearance and structure of your export is here.
My $blogExpOpt is normal (empty).
Export Window1.a
This is text from Export Window1.a.
[ About HTML export ]
Q 01: I would like to show every information in one Page.(like a all expanded style)
How can I do?
A01: Please choose [NONCOMPILE] as a POST.
You can specification using [$blogExpOpt],
In your "new note" position. using [Cmd+Opt+I ( Biggletter i )]
You get an Information Display, choose [attribute > User > blogExpOpt], specificate it.
【Tips】 If you like a collapse style. ----->> choose [COMPILE]
Same manner as set out above.
My $blogExpOpt is normal (empty).
Export Window1.a.i
This is text from Export Window1.a.i.
My $blogExpOpt is normal (empty).
UX Window
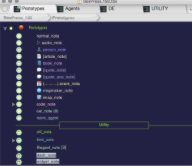
This screen image from UX Window.
you control every attribute of your notes..
contains the two most common agents plus three containers of utility agents .
the place to dig in, if you dare.
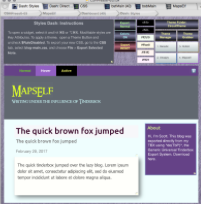
Content Window
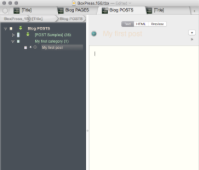
This screen image is Content Window.
My $blogExpOpt is normal (empty).
Content Window2
Short cut
This is text from Short cut.
「覚えておきたいshort cut」(Hitは省略します)(cmd = ⌘ command)
View it in the Text Pane : cmd+5
To open the note’s Text Pane or Text Window, respectively : cmd+5 or Opt+Cmd+X
To close the note’s Text Pane : cmd+6
maximize the Text Pane: cmd+4
closing-and-reopening : cmd+W and then Opt+Cmd+X
Get Info : Opt+ I (Capital i)
Make Alias : cmd+L
My $blogExpOpt is normal (empty).
View Shortcut
This is text from View Shortcut.
My $blogExpOpt is normal (empty).
This is text from View Shortcut. My $Prototype is sample_note. My $blogExpOpt is empty.
Stamps Shortcut
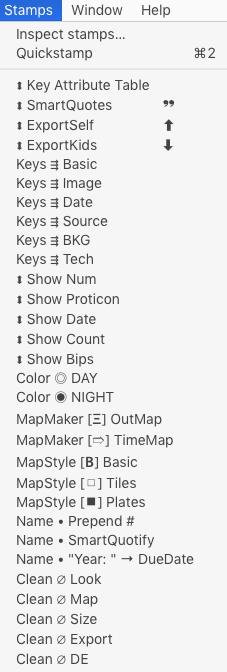
This is text from Stamps Shortcut.
My $Prototype is sample_note. My $blogExpOpt is empty.
Shortcut TBX
This is text from Shortcut TBX.
| shortcut | function |
|---|---|
| A---- | |
| A+[Cmd] | Select All |
| A+[Ctrl] | Scroll to top of window (Home) |
| A+[Cmd]+[Shift] | Create Agent |
| A+[Cmd]+[Opt] | Attribute Browser (change current tab’s main view type) |
| A+[Cmd]+[Opt]+[Ctrl] | Deselect All (hold Opt to see in menu) |
| B---- | |
| B+[Cmd] | Bold |
| C---- | |
| C+[Cmd] | Copy |
| C+[Ctrl] | Enter/Leave Edit-in-Place (main view selected note) |
| C+[Cmd]+[Opt] | Copy Style |
| C+[Cmd]+[Shift] | Copy View As Image |
| D--- | |
| D+[Cmd] | Duplicate |
| D+[Ctrl] | Scroll to bottom of window (End) |
| D+[Cmd]+[Ctrl]+Selection | show Dictionary pop-up ($Text and Edit-in-Place) |
| E---- | |
| E+[Cmd] | Use current selection for Find |
| E+[Cmd]+[Opt] | Explode |
| F---- | |
| F+[Cmd] | Find |
| F+[Cmd]+[Opt] | Find and Replace |
| F+[Cmd]+[Ctrl] | Enter/Leave Full Screen mode (toggle) |
| G---- | |
| G+[Cmd] | Find Next |
| G+[Cmd]+[Shift] | Find Previous |
| H---- | |
| H+[Cmd] | Hide Tinderbox |
| H+[Cmd]+[Opt] | New HTML View |
| I---- | |
| I+[Cmd] | Italic |
| I+[Ctrl] | Outline/Chart view insert Tab, i.e. indent item. |
| I+[Cmd]+[Opt] | Get Info |
| I+[Cmd]+[Shift] | Hypertext Status |
| J---- | |
| J+[Cmd] | Jump to Selection |
| K---- | |
| K+[Cmd] | Create Note |
| K+[Ctrl] | Scroll Page Up |
| K+[Cmd]+[Shift] | Show/Hide Key Attributes (selected item in main view) |
| L---- | |
| L+[Cmd] | Make Alias |
| L+[Cmd]+[Opt] | Browse Links |
| L+[Cmd]+[Ctrl] | Link to Selection (untyped link from $Text selection to cited note) |
| L+[Opt]+[Ctrl] | Make Web Link |
| M---- | |
| M+[Cmd] | Minimize |
| M +[Cmd]+[Opt] | Map (change current tab’s main view type) |
| N---- | |
| N+[Cmd] | New (TBX Document) |
| N+[Cmd]+[Shift] | New Window (for current document) |
| O---- | |
| O+[Cmd] | Open (TBX Document) |
| O+[Cmd]+[Opt] | Outline (change current tab’s main view type) |
| P---- | |
| P+[Cmd] | |
| P+[Cmd]+[Shift] | Page Setup |
| Q---- | |
| Q+[Cmd] | Quit Tinderbox |
| Q+[Cmd]+[Opt] | Quit and Keep windows (hold Opt key to see in menu) |
| R---- | |
| R+[Cmd] | Show Original |
| R+[Cmd]+[Shift] | Show Original in New Tab |
| R+[Cmd]+[Opt] | Chart (change current tab’s main view type) |
| R+[Cmd]+[Ctrl] | Show Ruler (if focus in text pane) |
| R+[Cmd]+[Opt]+[Ctrl] | Roadmap |
| S---- | |
| S+[Cmd] | Save |
| S+[Cmd]+[Opt]+[Shift] | Save As (hold Opt key to see in menu) |
| T---- | |
| T+[Cmd] | Show/Hide Fonts |
| T+[Cmd]+[Opt] | Show/Hide Toolbar (for current window) |
| T+[Cmd]+[Shift] | Standard Size (set selection to default $TextFontSize) |
| T+[Cmd]+[Opt]+[Ctrl] | Standard Font(set selection to default $TextFont) |
| U---- | |
| U+[Cmd] | Underline |
| V---- | |
| V+[Cmd] | Paste |
| V+[Cmd]+[Opt] | Paste Style |
| V+[Cmd]+[Opt]+[Shift] | Paste and Match Style |
| W---- | |
| W+[Cmd] | Close Window |
| W+[Cmd]+[Opt] | Close All (hold Opt key to see in menu) |
| W+[Cmd]+[Shift] | Close current TBX file (hold Shift key to see in menu) |
| X---- | |
| X+[Cmd] | Cut |
| X+[Cmd]+[Opt] | Text Window (open current note text pane as tear-off window) |
| ---- | |
| Y | |
| Z---- | |
| Z+[Cmd] | Undo (last event) |
| Z+[Cmd] | Edit-in-place mode: exit without committing changes |
| Z+[Cmd]+[Shift] | Redo (last event) |